Setting up your computer#
This chapter provides instructions for setting up your computer to run Python to analyse images.
NOTE: As preparation of the course you do not need to install anything on your computer because everything will be installed on virtual machines for you and you can access them from the course computer room. However, in case you want to play with the tools on your own computer, just follow these installation instructions below.
Setting up Python and Conda environments#
When working with Python, we will make use of many plugins and software libraries which need to be organized. One way of doing this, is by managing Conda environments. A conda environment can be seen as a virtual desktop, or virtual computer, accessible via the terminal. If you install some software into one Conda environment, it may not be accessible from another environment. If a Conda environment breaks, e.g. incompatible software was installed, you can just make a new one and start over.
See also
Step 1: Install Mini-forge#
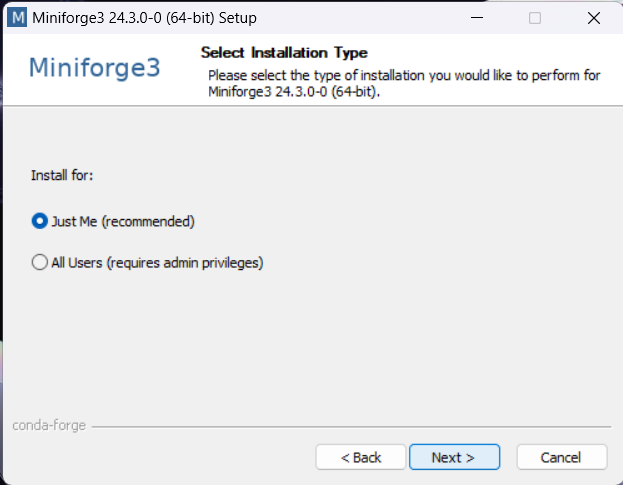
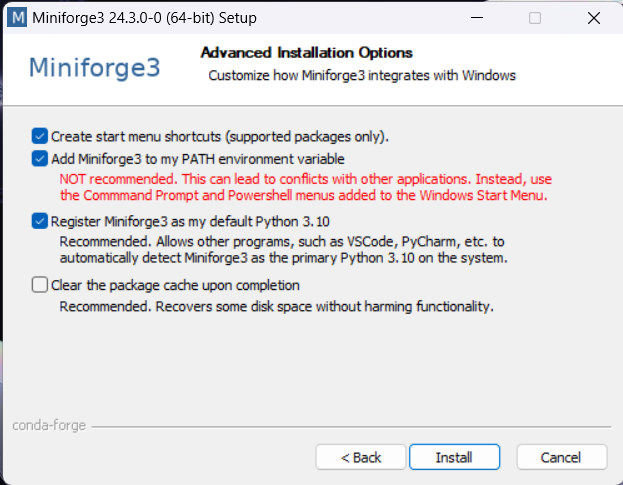
Download and install Conda. We recommend the Conda distribution mini-forge.
For ease-of-use, it is recommended to install it for your use only and to add Conda to the PATH variable during installation.
Step 2: Install devbio-napari#
We recommend installing devbio-napari, a distribution of napari with a set of plugins for bioimage analysis.
Use this command from the terminal:
conda create --name embo25 python=3.11 pyqt devbio-napari napari=0.5.6 pyclesperanto -c conda-forge
Afterwards, activate the environment:
conda activate embo25
For technical reasons, also this is required at the moment:
pip install napari-assistant==0.6.0 numpy==1.26.4 bia-bob python-dotenv
Tip: It is recommended to create one environment for every project you are executing. In that way installed software libraries and tools cannot harm each other.
Step 3: Testing the installation#
Whenever you want to work on the same project, you should start a command line and enter this:
conda activate embo25
Start Jupyter lab from the terminal like this
jupyter lab
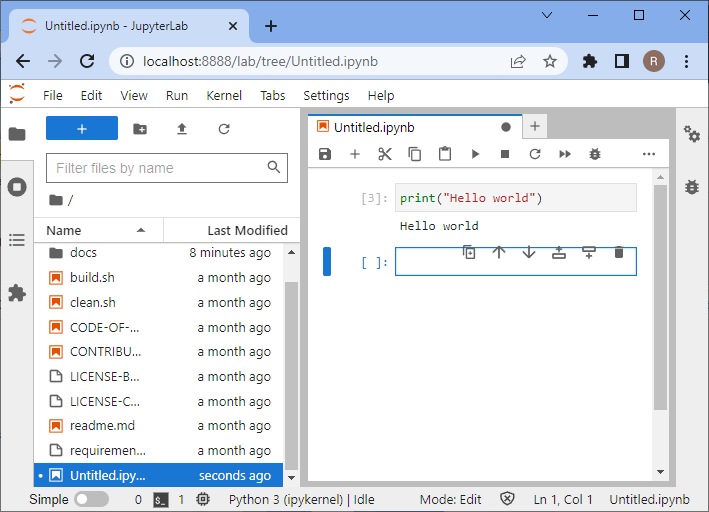
A browser will open and show you the following web page. In the section Notebook click on “Python 3 (ipykernel)” to create a new notebook:

In the new notebook, click in the first code cell, enter print("Hello world") and hit SHIFT+ENTER on your keyboard.
If everything is installed properly, it should look like this:
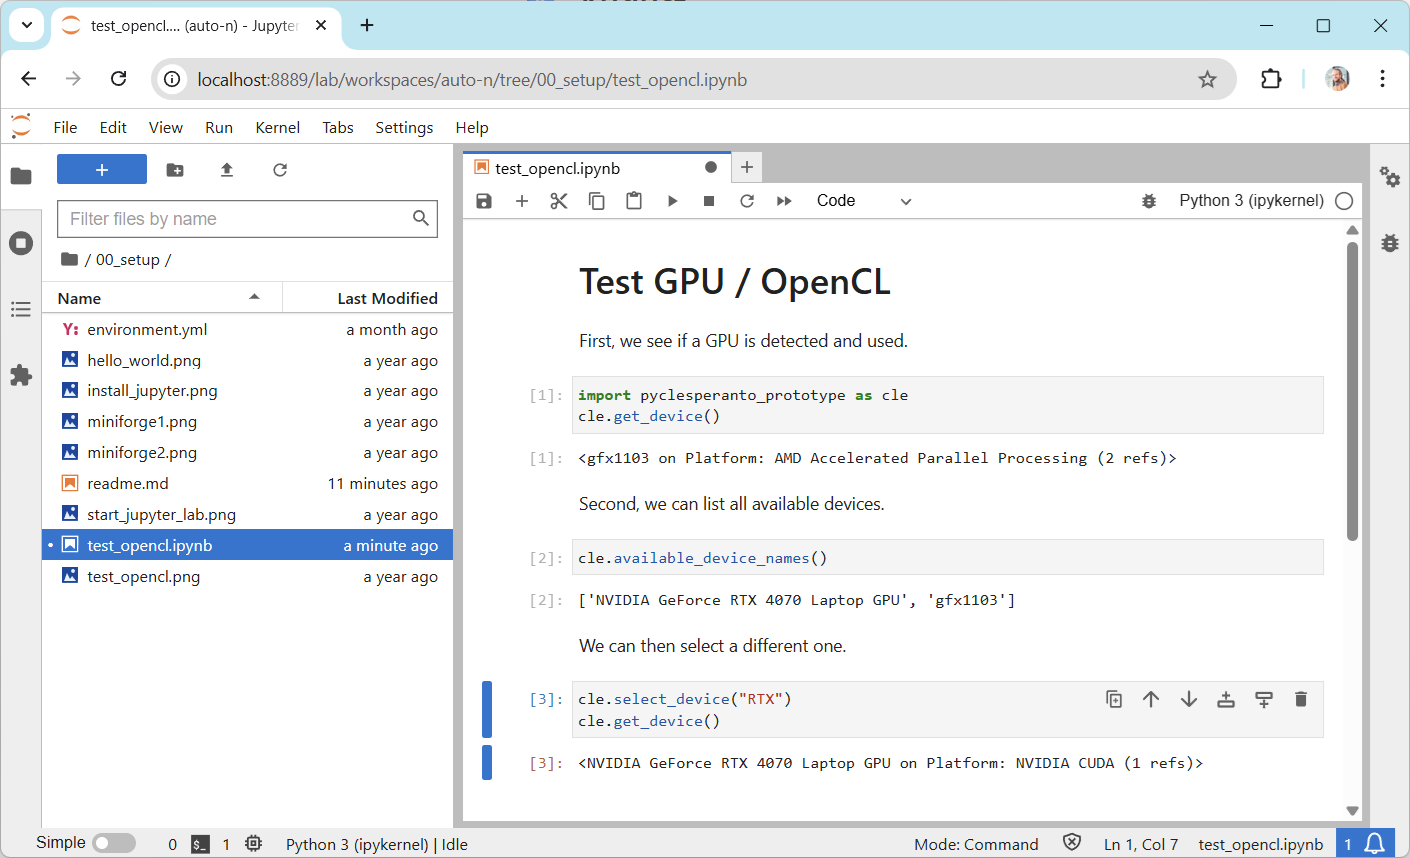
To test if your graphics card driver is properly installed, enter this code:
import pyclesperanto_prototype as cle

cle.get_device()
Troubleshooting: Graphics cards drivers#
In case error messages contains “ImportError: DLL load failed while importing cl: The specified procedure could not be found” see also or “”clGetPlatformIDs failed: PLATFORM_NOT_FOUND_KHR”, please install recent drivers for your graphics card and/or OpenCL device.
Select the right driver source depending on your hardware from this list:
Intel GPU drivers(https://www.intel.com/content/www/us/en/download/726609/intel-arc-graphics-windows-dch-driver.html)
Sometimes, mac-users need to install this:
conda install -c conda-forge ocl_icd_wrapper_apple
Sometimes, linux users need to install this:
conda install -c conda-forge ocl-icd-system
Troubleshooting: DLL load failed#
In case of error messages such as this one:
[...] _get_win_folder_with_pywin32
from win32com.shell import shellcon, shell
ImportError: DLL load failed while importing shell: The specified procedure could not be found.
Try this command, within the base environment:
conda activate base

pip install --upgrade pywin32==228